AC capacitors typically last 20 years, but this lifespan drops to 15 years in hotter regions like Florida or Texas.
Your AC system’s failing capacitor creates more problems than just inconvenience. It can prevent startup, reduce efficiency, and eventually cause total system breakdown. Many people think motors damage capacitors, but a weak capacitor can actually harm your motor. Your HVAC system depends on a working capacitor to function correctly – without it, you’ll face higher energy costs and repeated system breakdowns.
This complete guide will teach you the right way to check a capacitor using either a digital or standard multimeter. You’ll save money and extend your system’s life when you learn these proper testing techniques. The guide covers everything from basic visual checks to exact measurements, helping you identify faulty capacitors that need replacement.
Safety comes first, so let’s begin with the crucial precautions for capacitor testing.
Safety First: Preparing to Test a Capacitor
Testing capacitors demands strict safety procedures. Capacitors store electrical energy that can deliver dangerous shocks even when disconnected from power sources. Let me guide you through everything in safety steps.
Turn off power to the unit
You must disconnect power completely before touching any capacitor. HVAC systems have a service disconnect box near the outdoor condenser unit – move the lever or switch to the OFF position. A multimeter should verify that power is truly off – set it to AC voltage for AC circuits or DC voltage for DC circuits. This verification step matters because capacitors can retain charge even when equipment seems powered down.
Wear insulated gloves and safety glasses
Working with capacitors requires proper protection. You must wear:
- Voltage-rated insulated gloves (Class 00 for up to 500V, Class 0 for up to 1000V)
- ANSI Z87.1-compliant safety glasses or face shield
- Insulated footwear to prevent ground hazards
This safety gear protects you from electrical discharges during testing.
Discharge the capacitor safely
The capacitor needs full discharge before testing:
- Know your capacitor’s type – different capacitors need different discharge methods
- Connect a high-wattage resistor (10k-20k ohm, 5 watt) across terminals
- Keep the resistor in place for about five seconds
- Your multimeter should confirm complete discharge
Smaller capacitors with low voltage (below 50V) can be discharged using an insulated screwdriver to short terminals. In spite of that, using the resistor method is safer and prevents the capacitor’s damage.
Avoid common safety mistakes
These errors can cause injury or damage your equipment:
- Testing a capacitor while it’s connected to a circuit leads to wrong readings
- Handling capacitors without discharge risks electrical shock
- Using non-insulated tools instead of proper ones
- The capacitor can overheat if excessive voltage is applied
- Bare hands should never touch capacitor terminals
Note that damaged or leaking capacitors need immediate replacement and should not be tested. Being systematic with these safety protocols will let you test capacitors confidently.
Tools and Visual Checks Before Testing
A quick visual inspection and the right tools can save you time and prevent hazards before you start technical measurements. You can spot obvious problems with a good visual check without any testing.
Tools you’ll need: multimeter, pliers, screwdriver
These items are essential to check a capacitor:
- Digital multimeter with capacitance mode – You need this accurate tool to test how well your capacitor works
- Insulated screwdriver – This helps you safely discharge smaller capacitors and remove components
- Insulated pliers – These let you handle and disconnect wires safely
- Discharge tool with resistor – Your safety tool for high-voltage capacitors that prevents sparks
Your digital multimeter should include the capacitance function (usually marked with a “C” symbol) that measures in microfarads (µF). Professional technicians also use specialized equipment like ESR meters or dedicated capacitance testers to get a more complete diagnosis.
How to visually inspect a capacitor for damage
Failed capacitors show clear signs quickly. Watch out for these warning signals:
Bulging or swollen top/sides – A healthy electrolytic capacitor’s top stays flat. Any dome-shaped bulging shows internal pressure from failure
Leaking electrolyte – Dark or brown residue around the capacitor looks like dried coffee stains and signals electrolyte leakage
Cracked or burnt casing – Scorch marks, discoloration, or physical damage point to overheating or electrical arcing
Loose or corroded terminals – Bad connections can make your circuit unstable
When not to proceed with testing
Some situations make testing too risky:
- The capacitor shows clear physical damage like bulging, leaking, or burning
- You don’t have proper safety equipment or insulated tools
- Burn marks or melted wires spread beyond the capacitor
- The capacitor remains connected to a circuit (always disconnect first)
- The equipment’s warranty is still valid (DIY repairs might void it)
Capacitors in high-stress areas like power supplies fail more often than others. You should check these areas first when you troubleshoot electronic equipment.
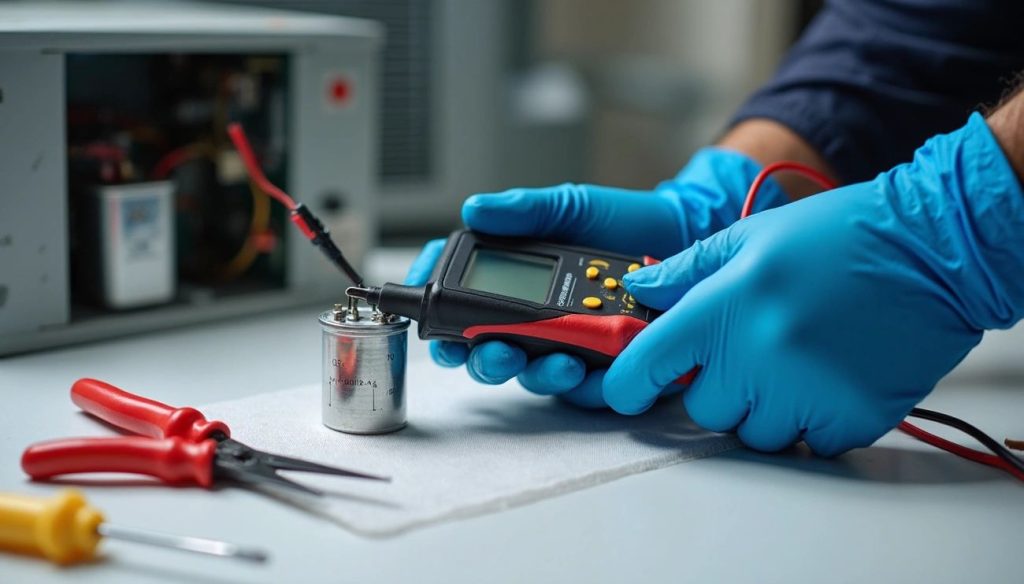
How to Check a Capacitor with a Multimeter

Image Source: Fluke Corporation
The visual inspection gives you a good start, but a multimeter provides the most accurate way to check a capacitor’s condition. This device measures exact capacitance values and helps you make a definitive diagnosis.
Set your multimeter to capacitance mode
Digital multimeters come with a dedicated capacitance mode, which you’ll recognize by the capacitor symbol (–|(–). Here’s how to set it up:
- Turn the selection dial to the capacitance symbol
- Some models need you to press the function button that cycles between shared settings until you see the capacitance symbol on screen
- The REL button helps with small capacitors – press it while keeping the test leads apart to eliminate the leads’ own capacitance
How to check a capacitor using a multimeter
Once your multimeter setup is complete:
- Make sure the capacitor has no charge left
- Take the capacitor completely off the circuit board
- Look for the capacitor terminals – electrolytic types have positive (usually the longer lead) and negative terminals
- Put the test leads on the terminals (red goes to positive, black to negative)
How to check a capacitor with a digital multimeter
Your digital multimeter calculates capacitance by charging the capacitor with a known current, measuring the voltage, and then working out the capacitance value. The process works like this:
- Auto-ranging models pick the right range automatically
- You’ll see the reading appear after a few seconds
- The numbers might jump around before settling on the final value
Compare readings with rated microfarads
Look for the rated value in microfarads (μF) on the capacitor’s body. Then check:
- A good capacitor shows readings within ±10% of the rated value
- Readings that drop 20% below the rated value point to a failing capacitor
- Manufacturing tolerances cause small differences, which is normal
How to check if a capacitor is bad
Your capacitor might be failing if:
- You see OL (overload) without exceeding the meter’s range
- The readings keep changing and won’t stabilize
- The capacitance value falls by a lot below the rated value
- You get zero or almost zero capacitance reading when expecting a value
Replacing a Faulty Capacitor Safely
Your equipment will run better and safer when you replace a faulty capacitor correctly. Let me walk you through each step of the replacement process.
Remove the old capacitor
The first step after discharging the capacitor is to disconnect all wires carefully. You should label each wire or take a photo to track their positions. Next, remove the mounting bracket or clips that hold the capacitor. The old capacitor should come out easily when you lift it gently without touching other components.
Choose the correct replacement
The replacement capacitor must match the microfarad (MFD) rating of your original unit. You’ll find this critical specification on the capacitor’s body. Your new unit’s voltage rating should equal or exceed the original – never go lower. The physical dimensions need to fit your mounting bracket properly.
Reconnect wires properly
Take out your labels or photos and connect each wire to its correct terminal. The terminals should fit tightly – squeeze them with needle-nose pliers before you install them. When working with dual run capacitors, make sure the common (C), HERM (compressor), and FAN connections align with the original setup.
Test the system after replacement
Connect the power by turning on the disconnect or flipping the breaker. The system should work perfectly now – both compressor and fan need to run at the right amperage. A power meter will help you check the motor’s power factor as an extra precaution.
Conclusion
Testing capacitors might seem scary at first, but this skill will save you time, money and help prevent system failures. This piece walks you through each significant step to safely diagnose capacitor problems.
Your safety comes first when handling these components. You must disconnect power, wear protective gear, and discharge capacitors properly before touching them. A quick visual check will reveal obvious issues like bulging or leaking, which makes this your first diagnostic step.
Your multimeter gives definitive proof of a capacitor’s condition. A reading within 10% of the rated value shows a healthy capacitor, while major variations mean you need replacements. The new capacitor must match the original’s microfarad rating exactly, though voltage ratings can go higher.
Regular capacitor checks prevent unexpected HVAC failures that can get pricey with emergency repairs. These components typically last 15-20 years based on climate, but harsh conditions can cut this lifespan nowhere near that range.
This knowledge gives you the confidence to check your system’s capacitors and decide if they need replacement. Note that good maintenance extends equipment life and will give optimal performance. Small preventative steps today will without doubt protect you from bigger problems tomorrow.
FAQs
Q1. How can I safely test a capacitor? Before testing, always turn off power, wear insulated gloves and safety glasses, and discharge the capacitor using a high-wattage resistor. Use a digital multimeter with capacitance mode to measure the capacitance value and compare it to the rated value on the capacitor.
Q2. What are the signs of a faulty capacitor? Visual signs include bulging or swollen tops, leaking electrolyte (brown residue), cracked casing, or loose terminals. When tested with a multimeter, a faulty capacitor may show readings significantly below the rated value, wildly fluctuating numbers, or zero capacitance.
Q3. Can I test a capacitor without removing it from the circuit? It’s not recommended to test a capacitor while it’s still connected to a circuit. For accurate results and safety, always remove the capacitor from the circuit board before testing with a multimeter.
Q4. How do I choose the correct replacement capacitor? Select a replacement that exactly matches the microfarad (MFD) rating of the original capacitor. The voltage rating can be equal or higher, but never lower. Also, ensure the physical dimensions fit the mounting bracket.
Q5. How often should capacitors be checked in HVAC systems? While capacitors typically last 15-20 years, regular checks are advisable, especially in hotter climates where lifespan may be shorter. Consider inspecting capacitors during routine maintenance to prevent unexpected failures and costly emergency repairs.
References
[1] – https://tameson.com/pages/capacitor-multimeter
[2] – https://www.fluke.com/en-us/learn/blog/digital-multimeters/how-to-measure-capacitance
[3] – https://www.wikihow.com/Measure-Capacitance
[4] – https://www.zvei.org/fileadmin/user_upload/Presse_und_Medien/Publikationen/2023/Maerz/General_Safety_Recommendations_for_Power_Capacitors/Update-Safety-Recommendations-Power-Capacitors.pdf
[5] – https://www.wevolver.com/article/how-to-discharge-a-capacitor
[6] – https://www.fluke.com/en-us/learn/blog/digital-multimeters/how-to-measure-capacitance?srsltid=AfmBOorOj1rEfAPI67zyip4Fi7iESXUuy6bFQAE90RmbV6e4aPF9s7im
[7] – https://www.wikihow.com/Test-a-Capacitor
[8] – https://www.quarktwin.com/blogs/capacitor/capacitor-testing-from-beginner-to-master/98?srsltid=AfmBOopywKj8paVpsALNEqjJ3wleOKN6lX2a_slXIm7MmslgpVG3epgJ
[9] – https://www.ersaelectronics.com/blog/capacitor-testing-guide?srsltid=AfmBOooZtsqrLxbDA733HXTT3_qTzwtW6NAxwti0I51kHX6RkFHdsRHf
[10] – https://www.ersaelectronics.com/blog/capacitor-testing-guide?srsltid=AfmBOooN-FYb-FB5KgtSrAseExasWfrscRG4jAtekEkZlrZtpwtiKQe0
[11] – https://www.keysight.com/used/us/en/knowledge/guides/how-to-test-a-capacitor
[12] – https://www.instructables.com/What-is-a-Bad-Capacitor/
[13] – https://bobsrepair.com/how-to-test-air-conditioner-capacitor/
[14] – https://www.quarktwin.com/blogs/capacitor/capacitor-testing-from-beginner-to-master/98?srsltid=AfmBOopvFWJzeehghmX6ghX2kd4A19-XX-NGryajUA3KeEdArzLvUkq1
[15] – https://www.skillcatapp.com/post/measuring-capacitance
[16] – https://www.ersaelectronics.com/blog/capacitor-testing-guide?srsltid=AfmBOooEyzapRiqrM38f0vIZ3FT6JrW5_I7GYcI6vk_majRmS9AsZHeX
[17] – https://www.keysight.com/used/us/en/knowledge/guides/how-to-test-capacitor-with-digital-multimeter
[18] – https://getparadisehvac.com/a-step-by-step-guide-to-replacing-your-air-conditioner-capacitor/
[19] – http://www.hvacrschool.com/capacitor-testing-and-replacement-procedure/
[20] – https://www.homedepot.com/c/ah/ac-capacitor-replacement/9ba683603be9fa5395fab901ca03363f
[21] – https://www.eevblog.com/forum/beginners/choosing-replacement-electrolytic-capacitors/
[22] – https://www.hvac.com/expert-advice/how-to-test-an-ac-capacitor/
[23] – https://aristotleair.com/heat-pump-capacitor-replacement/
[24] – https://www.dxmht.com/article/hvac-capacitor-how-to-test.html
[25] – https://www.fluke.com/en-us/learn/blog/digital-multimeters/how-to-measure-capacitance?srsltid=AfmBOoqlOvWWAO0H7DdDa5o72t5hIbr4ieGiaG1EYduwiTorJ_Z8YDq9
[26] – https://www.quarktwin.com/blogs/capacitor/capacitor-testing-from-beginner-to-master/98?srsltid=AfmBOop7-aT2yl9OOzPLaCWI4l4YNfpukyBPNcWaKmHXr6-VWX1jS0Pm
[27] – https://www.yamanelectronics.com/capacitor-safety-precautions/


